Ever wondered how barbers and stylists achieve those perfectly clean lines and smooth fades? It’s not just about skill – it’s also about knowing how to clean clipper blades properly. Whether you’re a seasoned pro or a home haircut enthusiast, maintaining clean clipper blades is essential for achieving a great cut and keeping your clippers in top shape.
In this comprehensive guide, we’ll unlock the secrets to properly cleaning your clipper blades. We’ll cover everything you need, from the essential tools to a detailed step-by-step cleaning process. We’ll also share expert maintenance tips and answer frequently asked questions to ensure you have all the knowledge you need. By the end, you’ll be a clipper cleaning pro, ready to enjoy smoother cuts, healthier hair and skin, and longer-lasting clippers. Let’s get started!
Why Cleaning Clipper Blades is Important
You might be wondering, “why all the fuss about cleaning clipper blades?” Well, keeping your clipper blades clean is crucial for a smooth, enjoyable, and even healthy grooming experience. Let’s break down the reasons why:
The Problem with Buildup
Over time, your clipper blades become a magnet for hair, oil, and dirt. This nasty trio creates a buildup that spells trouble:
- Hair: Tiny hair particles get trapped between the blades, causing them to dull and lose their cutting edge.
- Oil: While lubricating oil is essential for smooth operation, too much attracts dust and hair, turning into a sticky mess.
- Dirt: Environmental dirt and debris can settle on the blades, further hindering their performance.
How Dirty Blades Affect Your Grooming
Dirty clipper blades can significantly downgrade your grooming sessions. Here’s how they impact your experience:
- Reduced Cutting Efficiency: Clogged blades struggle to cut efficiently, making the process longer and more frustrating. You’ll find yourself going over the same area multiple times, leading to uneven results.
- Dull Blades: Buildup dulls the blades, resulting in a less polished look. Instead of a clean cut, you might end up with a choppy, uneven finish.
- Overheating: Dirty blades generate more friction, causing them to overheat quickly. This can be uncomfortable and even painful during use.
- Shortened Blade Life: Neglecting regular cleaning leads to faster wear and tear. This means more frequent and costly blade replacements.
Health Risks You Should Know About
Using unclean clipper blades isn’t just bad for your haircut; it can pose health risks:
- Skin Irritation: Dirty blades can cause skin irritation or rashes due to bacteria and debris being transferred during use.
- Infections: Uncleaned clipper blades can harbor harmful bacteria, potentially leading to infections or skin conditions.
- Allergic Reactions: Buildup of hair products or oils on the blades can trigger allergic reactions, especially for those with sensitive skin.
By regularly cleaning your clipper blades, you avoid these issues and enjoy a better grooming experience. Learning how to clean clipper blades properly helps you maintain your equipment, saving you time and money in the long run. Plus you will achieve a better quality cut.
Essential Tools and Materials for Cleaning Clipper Blades
Now that you understand why cleaning is crucial, let’s gather the right tools for the job. Having the right equipment makes learning how to clean clipper blades much easier and more effective.
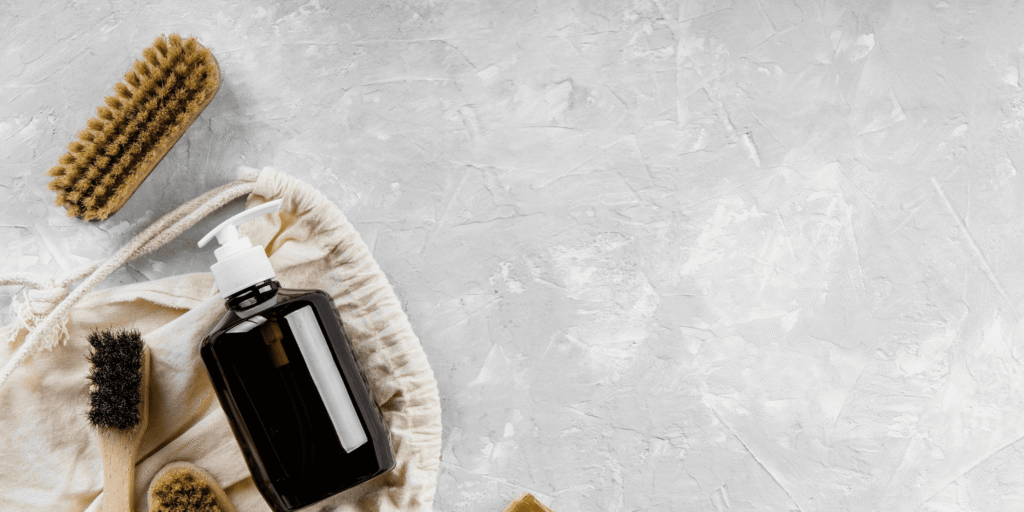
Must-Have Tools:
- Blade Brush: A small brush, often included with clippers, designed to remove loose hair and debris.
- Clipper Blade Cleaning Solution: A specially formulated liquid that dissolves oil, grime, and disinfects the blades.
- Clipper Blade Oil: A lubricating oil that reduces friction, prevents rust, and keeps the blades moving smoothly.
- Screwdriver: (If applicable) Used to remove the blades from some clipper models for a more thorough cleaning.
- Soft Cloth or Paper Towels: For drying and polishing the blades after cleaning.
Tool Descriptions and Purposes
Blade Brush
- Purpose: Removes loose hair and dirt from the blades and clipper body.
- Tip: Use the brush after every use to prevent buildup. A quick brush-off takes seconds but makes a big difference.
Cleaning Solution
- Purpose: Dissolves oil and grime buildup, effectively cleaning and sanitizing the blades.
- Fact: Many cleaning solutions also contain disinfectants to kill bacteria and germs, ensuring hygienic grooming.
- Recommendation: Look for solution like or Andis Cool Care Plus, which is widely used by professionals.
Blade Oil
- Purpose: Lubricates the blades to reduce friction, minimize wear, and prevent overheating.
- Usage Tip: Apply just 2-3 drops of oil after each cleaning for optimal performance.
- Recommendation: Andis Clipper Oil and Wahl Clipper Oil are excellent choices.
Screwdriver
- Purpose: Allows for the removal of blades on certain clipper models, enabling a deeper clean.
- Note: Not all clippers have removable blades. Use the correct type of screwdriver (usually Phillips or flathead) to avoid damaging the screws or the clipper.
Soft Cloth or Paper Towels
- Purpose: Used to dry the blades thoroughly after rinsing and to polish them after applying oil.
- Tip: Opt for lint-free materials to prevent any residue from being left behind on the blades.
Having these essential tools on hand will simplify the process of cleaning your clipper blades. Regular cleaning with the right equipment not only ensures optimal performance and extends the lifespan of your blades but also contributes to a smoother and more enjoyable grooming experience.
How to Clean Hair Clipper Blades: Step by Step
Ready to get your clipper blades sparkling clean? Follow these easy steps to ensure your clippers stay in top condition. This guide will walk you through how to clean clipper blades effectively, making your grooming routine a breeze.
Step 1: Preparation
- Turn Off and Unplug the Clippers: Safety first! Always ensure your clippers are completely turned off and unplugged from any power source.
- Remove the Blades (If Possible): If your clipper model allows, carefully remove the blades. This makes cleaning easier and more thorough. Refer to your clipper’s manual for instructions on how to do this safely.
Step 2: Initial Cleaning
- Brush Away Loose Hair and Debris: Use your trusty blade brush to remove any visible hair and dirt. This is a crucial first step to prevent buildup from getting pushed deeper into the blades during the cleaning process.
- Types of Brushes:
- Stiff-Bristle Brushes: Great for tackling stubborn debris and reaching into tight spaces.
- Soft-Bristle Brushes: Ideal for delicate cleaning and preventing scratches on the blade surface.
Step 3: Deep Cleaning
- Apply Cleaning Solution: Spray or apply a few drops of your chosen clipper blade cleaning solution onto the blades. Ensure the solution reaches all parts of the blades, including the teeth.
- Scrub-a-Dub-Dub: Use your brush to gently but thoroughly scrub the blades. Pay special attention to areas where dirt and oil tend to accumulate, such as the base of the teeth.
- Tight Spot Tip: For those hard-to-reach areas, use a small, detail brush or even a toothpick to carefully dislodge any trapped debris.
Step 4: Rinsing and Drying
- Rinse with Care: Rinse the blades under warm running water or wipe them down with a damp cloth. Make sure all traces of the cleaning solution are removed.
- Important: Avoid getting water inside the clipper body, as this can damage the motor and electrical components.
- Dry Thoroughly: Pat the blades dry with a soft, lint-free cloth or paper towel. Ensure no moisture remains, as this can lead to rust and corrosion.
Step 5: Lubrication
- Oil Up: Apply a few drops (2-3 is usually enough) of clipper blade oil along the edges and teeth of the blades.
- Distribute Evenly: Turn the clippers on for a few seconds to help spread the oil evenly across the blades. Wipe off any excess oil with a clean cloth.
Step 6: Reassembly and Final Check
- Reattach the Blades: Carefully reattach the blades to the clipper, ensuring they are securely fastened according to the manufacturer’s instructions.
- Alignment Check: Double-check that the blades are properly aligned and all screws are tightened. Misaligned blades can lead to uneven cuts and potential damage.
- Test Run: Turn on the clippers to make sure they are running smoothly. Listen for any unusual sounds and test the cutting performance on a small section of hair or a wig if possible.
By following these steps, you’ll master how to clean hair clipper blades like a pro. Regular maintenance keeps your clippers performing at their best, ensuring every grooming session is smooth and effective.
Maintenance Tips for Prolonging Blade Life
Even if you’re not a daily or weekly clipper user, regular maintenance is key to keeping your blades in top condition. Here’s how to extend the life of your clipper blades and ensure they’re always ready for a smooth grooming experience, even with infrequent use.
Establish a Regular Cleaning Schedule
- After Each Use: Even after a quick trim, brush off any loose hair and debris. This prevents buildup and keeps your blades ready for the next use.
- Monthly Deep Cleaning: Whether you’ve used them or not, give your clippers a thorough clean once a month. This includes applying a cleaning solution, scrubbing the blades, and oiling them.
- Fact: Regular maintenance keeps your blades sharp and your clippers running efficiently, no matter how often you use them. It’s like giving your car a regular tune-up, even if you don’t drive it every day.
Store Your Clippers Properly
- Dry Environment: Store your clippers in a cool, dry place. Humidity can cause rust and corrosion, damaging the blades and internal components.
- Protective Cover: Always use a blade guard or cover when storing your clippers. This protects the blades from dust, damage, and accidental nicks.
- Organized Space: Keep your grooming tools organized to avoid misplacing or damaging them. A cluttered space can lead to accidental drops or impacts.
- Pro Tip: Invest in a dedicated storage case for your clippers and accessories. This keeps everything safe, secure, and easily accessible.
Avoid These Common Mistakes
- Using the Wrong Cleaning Agents: Steer clear of harsh household cleaners. These can corrode or damage the blades. Stick to solutions specifically designed for clipper blades.
- Skipping Lubrication: Even with infrequent use, neglecting to oil your blades can lead to friction, overheating, and dullness. Oiling is crucial for maintaining smooth operation.
- Improper Blade Alignment: After reassembling your clippers, always ensure the blades are correctly aligned. Misaligned blades can result in uneven cuts and damage to the clippers.
- Bold Reminder: Always refer to your clipper’s user manual for specific care instructions and recommendations. Different models may have unique needs.
Don’t Forget Professional Servicing
- Annual Check-Ups: Even with infrequent use, take your clippers to a professional for a check-up and tune-up at least once a year. They can identify and address any potential issues you might miss.
- Blade Sharpening: Professionals can sharpen your blades more effectively than at-home methods, ensuring they remain in peak condition for precise cuts.
- Electrical Maintenance: Experts can inspect and maintain the clipper’s motor and electrical components, ensuring optimal performance and longevity.
- Fact: Investing in professional servicing can save you money in the long run by preventing costly repairs or replacements. It’s like taking your car to a mechanic for regular maintenance.
By following these maintenance tips, you’ll not only masterhow to clean clipper blades but also ensure they stay sharp and efficient. Regular care and professional attention can make all the difference in your grooming routine, extending the life of your clippers and providing a consistently superior grooming experience.
Frequently Asked Questions (FAQs)
Got questions about how to clean clipper blades? We’ve got answers! Here are some of the most common questions we get, along with clear and practical advice to help you become a clipper-cleaning pro.
What’s the Best Way to Clean Clipper Blades?
The best way to clean clipper blades involves a few simple steps:
- Brush Off Loose Hair and Debris: Use a blade brush to remove any hair and dirt.
- Apply Cleaning Solution: Use a solution specifically designed for clipper blades, like Clippercide or Andis Cool Care Plus.
- Scrub the Blades: Gently scrub with a brush to remove any buildup.
- Rinse and Dry: Rinse the blades carefully and dry them completely to prevent rust.
- Lubricate: Apply a few drops of blade oil, such as Andis Clipper Oil or Wahl Clipper Oil, to keep them running smoothly.
Pro Tip: Clean your blades after each use and give them a deep clean once a month to keep them in top shape.
Can You Clean Clipper Blades with Soap and Water?
While soap and water might seem like a convenient option, they’re not ideal for cleaning clipper blades. Here’s why:
- Soap Residue: Soap can leave a residue that might cause the blades to stick or become dull.
- Water Damage: Excessive water can cause rust and damage the blades or internal components of the clippers.
Better Option: Use a blade cleaning solution that is specifically formulated for clippers. It’s designed to clean effectively without leaving harmful residues or causing water damage.
How Often Should Clipper Blades Be Cleaned?
- After Each Use: Brush off loose hair and apply a quick clean with a cleaning solution or spray.
- Monthly Deep Clean: Whether you use them frequently or not, give your clippers a thorough cleaning and oiling once a month.
How Do You Sterilize Clipper Blades?
Sterilizing your clipper blades is crucial to prevent infections and ensure hygiene, especially if you share your clippers or use them professionally. Here’s how:
- Clean the Blades: Follow the regular cleaning steps first to remove any hair, dirt, and oil.
- Use a Disinfectant Spray: Apply a disinfectant spray specifically designed for clipper blades, such as Clippercide or Barbicide spray.
- Soak in Disinfectant (Optional): For a deeper sterilization, you can soak the blades in a disinfectant solution like Barbicide for 10-15 minutes. Follow the product’s instructions for dilution ratios.
- Dry Completely: Ensure the blades are thoroughly dried to prevent rust after sterilization.
Pro Tip: Regular sterilization is especially important if you share your clippers with others or use them on multiple clients.
By following these tips, you’ll master how to clean clipper blades and keep them in excellent condition. Consistent cleaning and proper maintenance ensure your clippers perform at their best and last longer, giving you a smooth and enjoyable grooming experience every time.
Conclusion: Mastering How to Clean Clipper Blades
Mastering how to clean clipper blades is a crucial step towards achieving a superior grooming experience. This guide has provided you with the knowledge to not only extend the life of your clippers but also to maintain their optimal performance, ensuring precise and comfortable cuts every time.
Remember, regular maintenance is key. Clean your blades after each use, deep clean them monthly, and always use the right tools: a quality blade brush, a professional-grade cleaning solution, and the proper clipper oil. Avoid common mistakes like using household cleaners, and never underestimate the importance of lubrication and sterilization, particularly if you share your clippers. An annual visit to a professional for servicing can also make a significant difference.
By incorporating these practices into your routine, you’re investing in more than just clean clippers; you’re investing in smoother cuts, healthier skin, and a longer lifespan for your grooming tools. So, confidently apply your new-found expertise on how to clean clipper blades, give your clippers the care they deserve, and enjoy the many benefits of well-maintained blades. Your path to clipper mastery starts now!

