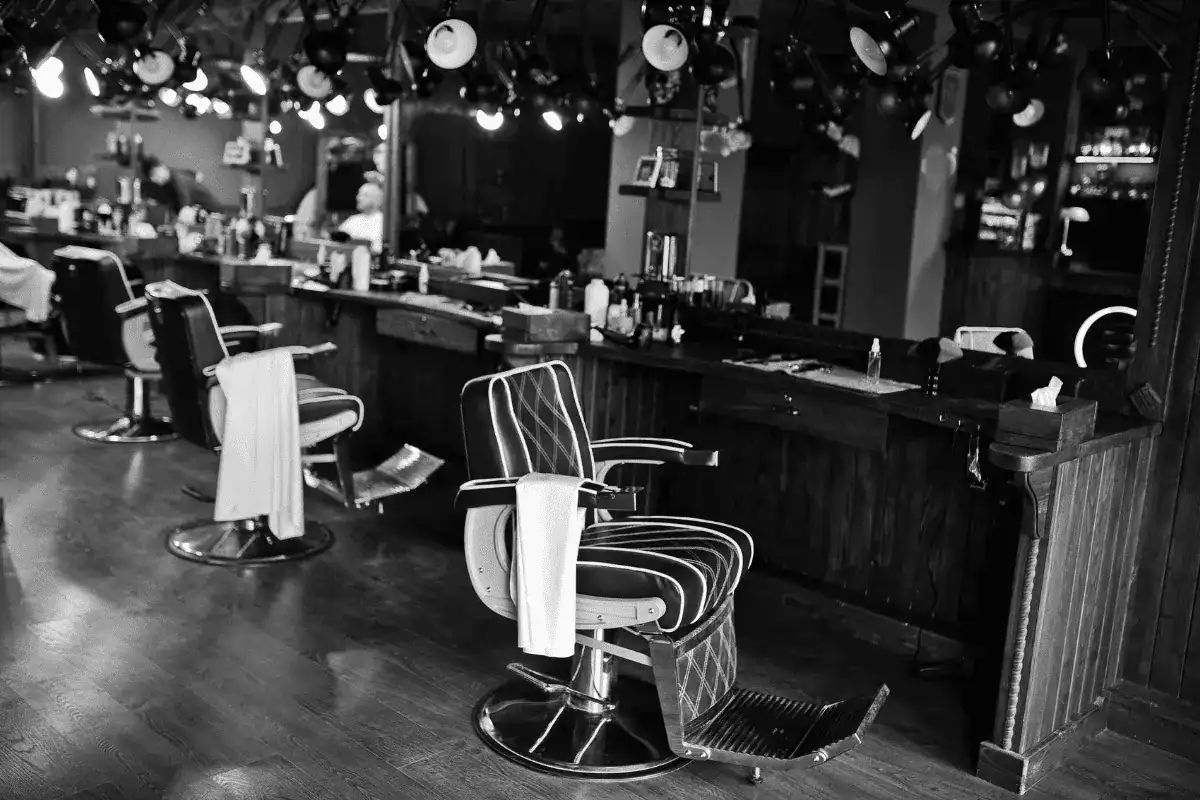
Skip to content

Country

A black hair clipper with a shiny finish and an attachment comb alongside a fine-toothed comb on a rustic wooden background, representing materials for the guide on how to clean hair clippers by Beard Beasts Men's Grooming.

How to Clean Hair Clippers: A Step-by-Step Guide

Whether you're a professional barber or someone who prefers to trim their hair at home, knowing how to clean hair clippers is essential. Clean clippers not only ensure a smoother and more precise cut but also prolong the life of your grooming tool.

In this comprehensive guide, we'll walk you through the essential steps and tips to keep your clippers in top-notch condition. From the basic tools you'll need, safety precautions, to detailed cleaning and maintenance techniques, we've got you covered.

By the end of this article, you'll be equipped with all the knowledge necessary to keep your hair clippers working efficiently, ensuring they're always ready for your next grooming session.

Let's dive into the world of clipper care, where a little effort goes a long way in maintaining the quality and performance of your trusted grooming companion.

Why Clean Your Hair Clippers?

Keeping your hair clippers clean isn't just about hygiene; it's essential for ensuring they operate efficiently, maintain sharpness, and last longer. When you learn how to clean hair clippers properly, you're taking a crucial step towards safeguarding your grooming routine against common yet preventable issues. Here's why cleaning your clippers should be a non-negotiable part of their upkeep:

An image showing a set of hair clippers with attachments and a comb on a wooden surface, representing a guide on how to clean hair clippers.

  • Prevent Dull Blades: Hair and product buildup can coat the blades, leading to them becoming dull faster. Regular cleaning removes this buildup, keeping the blades sharp and effective.

  • Maintain Efficiency: Clean clippers work better. Hair, skin, and other debris can clog up your clippers, forcing them to work harder. This not only leads to uneven cuts but can also wear down the motor over time.

  • Avoid Skin Infections: Dirty clippers are breeding grounds for bacteria. Using unclean clippers can introduce these bacteria to your skin, leading to infections or irritations. It's not just about looking good; it's about staying healthy.

  • Enhance Longevity: Regular maintenance, including cleaning, can significantly extend the life of your hair clippers. By removing debris and ensuring they're properly lubricated, you're helping to prevent rust and keep the motor in good shape.

By learning how to clean hair clippers properly and incorporating this simple yet effective habit into your routine, you're not just investing in the longevity of your device; you're also ensuring a safer, more efficient grooming experience. Remember, a little care goes a long way in maintaining the performance and hygiene of your grooming tools.

What You Need

Cleaning your hair clippers doesn't require fancy equipment, but having the right tools on hand can make the process smoother and more effective. Here's a straightforward list of essentials you'll need to properly clean your clippers. By gathering these items, you'll be prepared to tackle the task of keeping your clippers in top-notch condition, ensuring they're always ready for a clean, precise cut.

  • Cleaning Brush: Most hair clippers come with a small brush designed specifically for removing hair and debris from the blades. If yours didn't, or if it's lost, a soft-bristled toothbrush or paintbrush can work in a pinch.

  • Lubricating Oil: Clipper oil or an hair clipper oil alternative is essential for keeping the blades moving smoothly and preventing rust. Just a few drops after each clean will do the trick.

  • Isopropyl Alcohol: For sanitizing the blades and killing any bacteria, a bottle of isopropyl alcohol (at least 70% concentration) is a must-have. It evaporates quickly, leaving your clippers clean and disinfected.

  • Soft Cloth: A microfiber or cotton cloth is perfect for wiping down your clippers after cleaning and applying alcohol. It helps remove any leftover debris and ensures the clippers are dry before storage or use.

  • Small Screwdriver (optional): Some clippers require a screwdriver to remove the blades for a thorough cleaning. Check your clipper's manual to see if this applies to yours.

By ensuring you have these items ready before you start, you'll streamline the cleaning process, making it easier and more efficient. Remember, learning how to clean hair clippers is not just about the act itself but also about being prepared and using the right tools for the job. With these essentials, you're all set to keep your clippers in pristine condition, ensuring their longevity and reliability in your grooming routine.

Safety First, Always

Before diving into the cleaning process, it's crucial to prioritize your safety and the well-being of those around you. Cleaning your hair clippers involves handling sharp blades and, for electric models, dealing with electrical components. Here are some key safety precautions to keep in mind to ensure a smooth and accident-free cleaning routine:

  • Unplug Electric Clippers: Always make sure your electric clippers are unplugged before you start cleaning. This eliminates the risk of electric shock and ensures the clippers won’t turn on accidentally while you’re working on them.

  • Battery-Powered Clippers: If your clippers are battery-powered, remove the batteries before cleaning. This is another step to ensure the clippers don't accidentally turn on during the cleaning process.

  • Handle Blades Carefully: The blades are sharp and can easily cause cuts. Handle them with care, especially when brushing off hair or applying cleaning solutions. Using the cleaning brush provided or a soft-bristled brush can help you avoid direct contact with the blades.

  • Use Protective Gloves: Consider wearing gloves when cleaning your clippers, especially if you're using isopropyl alcohol or other cleaning agents. This not only protects your hands from sharp edges but also from any harsh chemicals.

  • Work in a Well-Ventilated Area: When using isopropyl alcohol or any chemical disinfectants, ensure you're in a well-ventilated area to avoid inhaling fumes.

By following these safety precautions, you can learn how to clean hair clippers without putting yourself or others at risk. Remember, taking a few moments to prepare and ensure safety can make learning how to clean hair clippers a hassle-free and safe task. Safety first, always!

How to Clean Hair Clippers: Step-by-Step

Keeping your hair clippers clean ensures they last longer and perform at their best. Follow these simple, step-by-step instructions on how to clean hair clippers effectively.
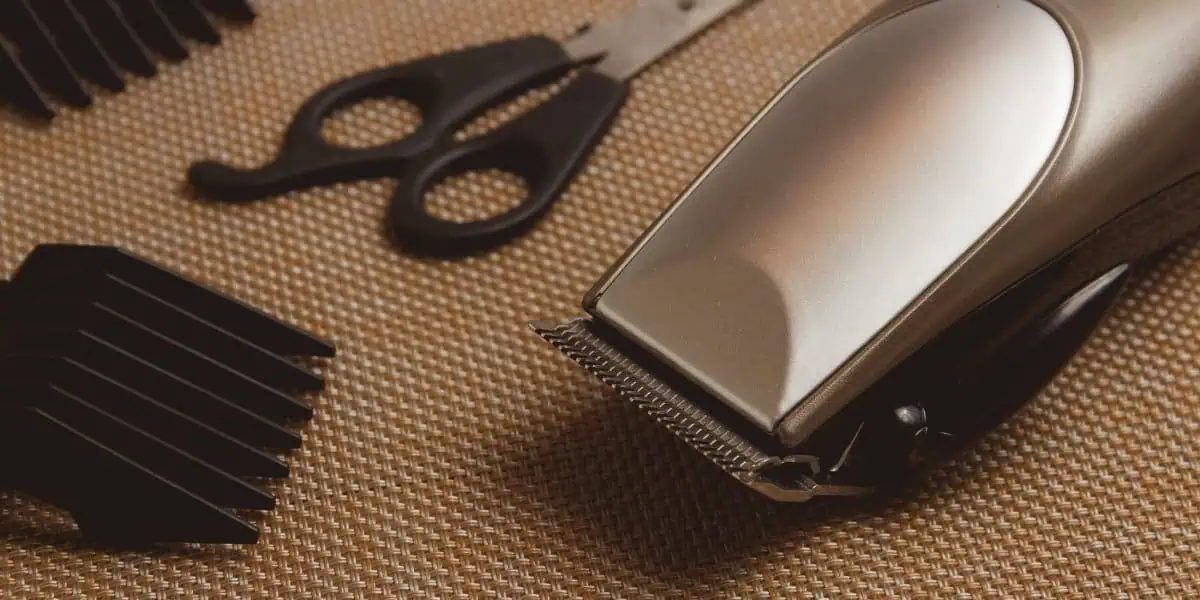
 Whether you're a seasoned pro or new to grooming tools, these tips will help you maintain your clippers with ease.

Disassemble Your Clippers

  1. Safety First: Ensure the clippers are unplugged or the batteries are removed.
  2. Consult the Manual: Some clippers come apart differently. Quickly check your clipper’s manual for specific disassembly instructions.
  3. Remove Blades and Attachments: Carefully take off any attachments. Use a screwdriver if needed to detach the blades. Keep all screws and parts in a safe place.

Removing Hair and Debris

  1. Brush Away Hair: Using the cleaning brush or a soft-bristled brush, gently remove all visible hair and debris from the blades and body of the clippers. Pay special attention to the areas between the blades.
  2. Tap Out Excess: Gently tap the clipper body and blades on a hard surface to dislodge any trapped hair or debris.

Sanitizing the Clippers

  1. Apply Isopropyl Alcohol: Soak a soft cloth in isopropyl alcohol and gently wipe the blades and clipper body. You can also use a spray bottle to apply alcohol directly to the blades before wiping.
  2. Disinfectant Options: For a deeper clean, consider using a clipper-specific disinfectant spray following the product's instructions.
  3. Safety Note: Ensure good ventilation when using any disinfectant or alcohol.

Drying the Components

  1. Air Dry: Let the blades and clipper body air dry on a clean towel or paper towel. Ensure they are completely dry before reassembly.
  2. Soft Cloth: If you're in a hurry, gently pat dry with a soft cloth. Avoid using heat or direct sunlight as it can damage the parts.

Reassembling your clippers after they are dry ensures that no moisture is trapped inside, which could lead to rust or malfunction. By following these simple steps to disassemble, clean, sanitize, and dry your hair clippers, you're not just cleaning them; you're extending their lifespan and ensuring they're safe and ready for your next grooming session. Remember, a clean clipper is a happy clipper!

Lubricating Your Clippers

After your hair clippers are clean and dry, the next essential step to ensure their longevity and optimal performance is lubrication. Proper lubrication reduces friction between the blades, keeps them sharp, and prevents rust. Here's how to do it right:

  1. Choose the Right Oil: Use the lubricating oil specifically designed for hair clippers. These oils are formulated to withstand the high speed of clipper blades without gumming up.

  2. Turn On the Clippers: Plug in your clippers or reinsert the batteries. Turn them on to help evenly distribute the oil during application.

  3. Apply the Oil: Place a few drops of oil across the top of the blades while the clippers are running. Aim for the middle of the blade and each end. Avoid using too much oil, which can attract dirt and hair, leading to buildup.

  4. Distribute the Oil: Let the clippers run for 10-20 seconds. This allows the oil to spread evenly between the blades.

  5. Wipe Off Excess: Turn off the clippers and gently wipe away any excess oil with a soft cloth. This prevents oil from getting on your skin or hair during the next use.

  6. Regular Lubrication: Make lubricating your clippers a regular part of your maintenance routine, ideally after each cleaning or after several uses, depending on how often you use them.

By following these simple lubrication steps, you'll ensure your hair clippers operate smoothly, reduce wear and tear on the blades, and extend the life of your grooming tool. Remember, a well-lubricated clipper is key to a smooth, efficient cutting experience.

Reassembling Your Clippers

After your hair clippers are clean, dry, and lubricated, the next step is to put them back together. Reassembling your clippers correctly is crucial for their optimal performance and longevity. Here’s a straightforward guide to ensure you get it right, keeping the process simple and stress-free.

  1. Gather All Parts: Make sure you have all the parts laid out and ready to go. This includes the blades, screws, and any attachments you removed during cleaning.

  2. Attach the Blades: Carefully place the blades back onto the clipper body. If your clippers have specific alignment notches or guides, make sure the blades are aligned correctly. This step is crucial for ensuring smooth operation.

  3. Secure the Blades: Once the blades are in place, secure them with the screws you removed earlier. Don’t tighten the screws too much at first; you may need to adjust the blade alignment for optimal performance.

  4. Test the Alignment: Before fully tightening the screws, ensure the blades are aligned properly. Misaligned blades can cause pulling or inefficient cutting. Adjust as necessary.

  5. Tighten the Screws: Once you’re satisfied with the blade alignment, tighten the screws completely. Be careful not to over-tighten, as this can damage the screws or the clipper body.

  6. Reattach Attachments: If your clippers came with guard attachments or other accessories, now is the time to put them back on. Make sure they fit securely and are properly attached.

  7. Final Check: Give your clippers a final inspection to ensure everything looks right and feels secure. It’s a good idea to turn them on and test them (if electric) to ensure they’re working correctly. Listen for any unusual noises and check that the blades are moving smoothly.

Reassembling your hair clippers properly after cleaning is a critical step in the maintenance process. By following these simple instructions, you ensure that your clippers are ready for their next use, operating smoothly and efficiently. Remember, taking the time to reassemble your clippers with care will pay off in their performance and longevity, making the how to clean hair clippers process complete and successful.

Regular Maintenance Tips

To ensure your hair clippers continue to perform at their best, regular maintenance is key. This doesn't just keep them running smoothly; it also extends their lifespan, saving you money and hassle in the long run. Here's how to incorporate maintenance into your routine, keeping those clippers in top condition.

How Often to Clean and Oil

  • After Every Use: Brush off hair and debris to prevent buildup. A quick wipe with a dry cloth can help remove any lingering bits.

  • Deep Clean Monthly: Depending on your usage, aim for a thorough cleaning once a month. This involves disassembling (if possible), removing all hair, sanitizing with isopropyl alcohol, and letting the parts dry completely.

  • Lubrication: Apply a few drops of clipper oil to the blades every few uses or after each clean. This is crucial for keeping the blades sharp and ensuring smooth operation. If you use your clippers daily, consider oiling them more frequently.

Keeping Blades Sharp

  • Check for Dullness: Pay attention to how well your clippers are cutting. If you notice snagging or uneven cuts, it might be time to sharpen the blades or replace them.

  • Storage: Store your clippers in a clean, dry place to avoid dust and humidity, which can dull the blades faster and promote rust.

Avoid Overheating

  • Let Them Rest: If your clippers start to get hot during use, give them a break to cool down. Overheating can damage the motor and the blades.

  • Check for Obstructions: Regularly check the air vents and remove any hair or debris that might be blocking airflow, which can cause the clippers to overheat.

By following these regular maintenance tips, you'll keep your hair clippers functioning efficiently and effectively. Remember, the key to longevity is not just how to clean hair clippers but also how you care for them between uses. A little effort goes a long way in ensuring your grooming routine remains uninterrupted and your clippers stay in prime condition.

Troubleshooting Common Issues

Even with meticulous care, hair clippers can sometimes act up. If you've noticed your clippers aren't performing as they should after a cleaning, don't worry. Here are simple solutions to some common issues, ensuring your grooming tools continue to work efficiently.

Noisy Operation

  • Tighten the Blades: Sometimes, the screws that hold the blades in place can loosen, causing excessive noise. Tighten them with a screwdriver, but be careful not to overtighten, as this can also cause problems.
  • Lubricate: A lack of oil can make the clippers noisy. Apply a few drops of lubricating oil to the blades and the moving parts of the clipper to reduce friction and noise.

Uneven Cutting

  • Check Blade Alignment: Misaligned blades can lead to uneven cuts. Ensure the blades are properly aligned according to the manufacturer's instructions. They should be parallel and slightly offset.
  • Clean Thoroughly: Even small amounts of hair or debris trapped between the blades can affect cutting performance. Double-check that the blades are completely clean and free of obstruction.
  • Sharpen or Replace Blades: Dull blades can result in uneven cutting. Consider sharpening the blades or replacing them if they're beyond repair.

Clippers Not Turning On

  • Check the Power Source: Ensure the clipper is properly plugged in or the batteries are charged. If using a corded clipper, inspect the cord for any damage.
  • Internal Cleaning: Dust and hair can accumulate inside the clipper, interfering with its operation. Carefully open the housing (if possible) and clean any debris from the inside.

Overheating

  • Proper Lubrication: Regular lubrication helps reduce friction, one of the main causes of overheating. Make sure you're oiling the blades regularly.
  • Allow to Cool: If your clippers heat up quickly, turn them off and let them cool down before continuing. Continuous operation when hot can damage the motor.

By addressing these common issues with simple, effective solutions, you can often resolve problems without needing professional repair. Remember, knowing how to clean hair clippers and performing regular maintenance are key to preventing many of these issues from arising in the first place. With the right care, your clippers will continue to provide reliable service for all your grooming needs.

Frequently Asked Questions

When it comes to maintaining and learning how to clean hair clippers, several common questions often arise. Here, we address these queries with straightforward, helpful answers to ensure your clippers remain in optimal condition.

What can you use to clean hair clippers?

To clean hair clippers, you'll need a few key items: a cleaning brush or an old toothbrush to remove hair and debris, isopropyl alcohol for sanitizing the blades, and a soft cloth for drying. For lubrication, a clipper-specific oil is recommended to ensure smooth operation.

How do you clean the inside of a clipper?

Cleaning the inside of a clipper involves carefully removing the blades and attachments to access the interior. Use a brush to gently remove hair and debris. If your model allows, you can slightly open the housing to clean inside; however, consult your clipper's manual to avoid damaging the mechanism. A blast of compressed air can also help dislodge any trapped particles.

Can I use olive oil to clean clippers?

While olive oil is not recommended for cleaning clippers, it can be used as a temporary lubricant if you're out of clipper oil. However, it's not a long-term solution because vegetable oils can become rancid and gum up the blades. For best performance, use the oil specifically designed for hair clippers.

How often should you oil your hair clippers?

You should oil your hair clippers every few uses or whenever they start to feel dry or drag against the skin. After cleaning is an ideal time to apply oil. A few drops on the blade tips and moving parts are sufficient. Regular oiling keeps the blades sharp and ensures the motor runs smoothly, extending the life of your clippers.

Keeping these FAQs in mind will help you maintain your hair clippers effectively, ensuring they're always ready for a precise trim. Remember, proper care and maintenance are key to the longevity and performance of your grooming tools.

Concluding How To Clean Hair Clippers

Maintaining and knowing how to clean hair clippers is crucial for anyone looking to keep their grooming tools in prime condition. By following the step-by-step guide provided, from disassembling your clippers for a thorough clean, to regular oiling and maintenance, you can ensure your clippers perform at their best for years to come. Remember, the key to extending the life of your clippers involves regular cleaning, proper lubrication, and addressing common issues promptly.

Here are the key takeaways to keep in mind:

  • Safety first: Always unplug or remove batteries before cleaning.
  • Regular cleaning and oiling: This prevents buildup, maintains blade sharpness, and ensures efficient operation.
  • Proper storage: Keep your clippers in a dry place to avoid rust and damage.
  • Troubleshoot common issues: Address problems like noisy operation or uneven cutting promptly to prevent further damage.

By incorporating these practices into your routine, you're not just caring for your clippers; you're investing in the longevity of your grooming tools. Clean, well-maintained clippers lead to better performance, smoother cuts, and a more enjoyable grooming experience. So, take the time to care for your clippers, and they'll take care of you.

Older Post
Newer Post
Back to top

Shopping Cart

Your cart is currently empty

Shop now